How to Set Up a Walking Pad Desk (2026 Guide)
The walking pad is the easy purchase. The desk setup around it is where most people fail.
Here is what typically happens: you unbox the walking pad, slide it under your existing standing desk, start walking, and within 20 minutes your neck hurts. Your desk was set for standing on the floor. The walking pad just added 5 inches of height. Your monitor is now at chest level. Your keyboard is at hip level. Everything is wrong.
Or you are at a sitting desk and you stack books under your monitor, prop the keyboard on a box, and create a Frankenstein workstation that wobbles and frustrates until you give up and conclude that walking pads do not work.
Walking pads work. Bad desk setups do not. This guide walks you through the exact setup process — three measurements, three adjustments, and you are done.
The Three Measurements That Matter
Your entire walking pad desk setup comes down to three heights:
| Measurement | What It Is | How to Find It |
|---|---|---|
| Desk height | Elbow height while on the pad | Stand on the pad in shoes, arms relaxed, bend elbows to 90° |
| Monitor height | Eye level while walking | Walk on the pad, look straight ahead, measure eye height |
| Keyboard height | Where forearms are parallel to floor | Same as desk height if keyboard sits on desk surface |
If desk height = keyboard height = elbow height, and monitor top = eye height, your setup is correct. Everything else is detail.
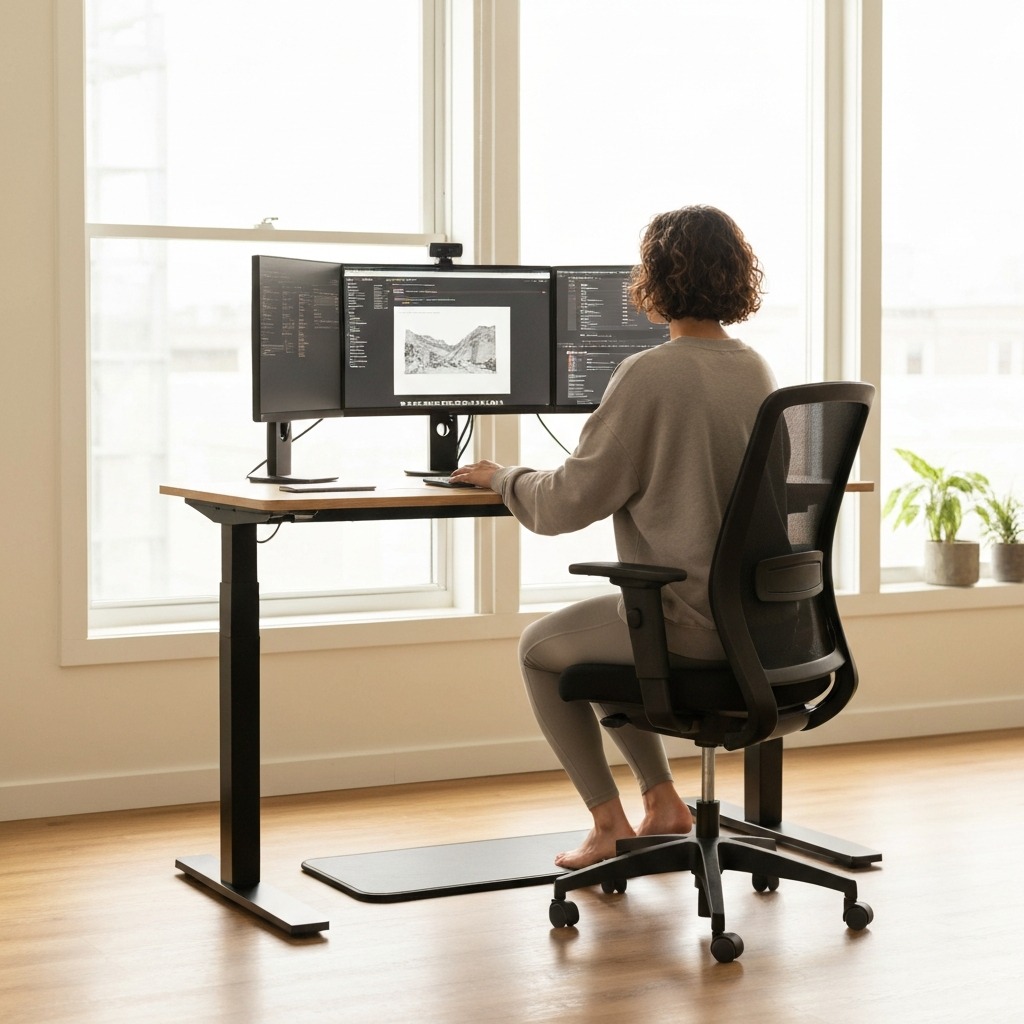
Step 1: Desk Height Adjustment
Why the Walking Pad Changes Everything
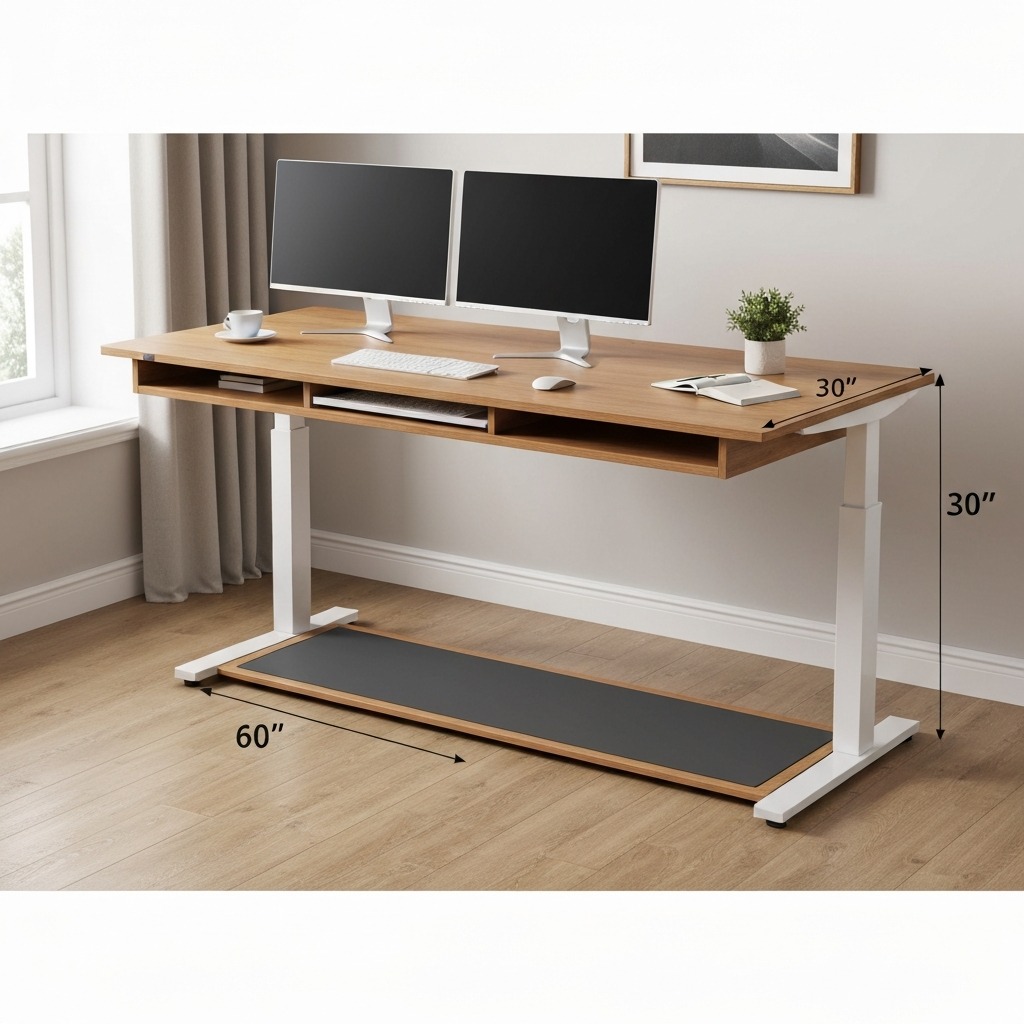
A standard sitting desk is 28–30 inches high. A standing desk is typically set at 38–44 inches depending on your height. A walking pad adds:
- Platform height: 4–5 inches (the pad itself)
- Shoe height: 0.5–1.5 inches (walking shoes or insoles)
- Total addition: 4.5–6.5 inches above floor level
This means your desk needs to be 4.5–6.5 inches higher than your normal standing desk height.
How to Set the Correct Height
- Stand on the walking pad (not running). Wear the shoes you will walk in.
- Let your arms hang relaxed at your sides.
- Bend your elbows to 90 degrees — forearms pointing straight forward, parallel to the floor.
- Measure from the floor to the bottom of your forearms. This is your target desk surface height.
- Adjust your desk to this height. If your keyboard will sit directly on the desk surface, you are done.
Desk Height Reference by User Height
| Your Height | Standing Desk (no pad) | Walking Pad Desk (with pad + shoes) |
|---|---|---|
| 5'2" (157 cm) | 36–38" | 41–44" |
| 5'5" (165 cm) | 38–40" | 43–46" |
| 5'8" (173 cm) | 40–42" | 45–48" |
| 5'11" (180 cm) | 42–44" | 47–50" |
| 6'1" (185 cm) | 43–46" | 48–52" |
| 6'3" (191 cm) | 45–48" | 50–54" |
These are starting estimates. Use the elbow measurement method for your exact height.
What If My Desk Does Not Go High Enough?
Most electric adjustable desks max out at 48–50 inches. If you are tall (over 6'0") and your desk cannot reach your walking pad elbow height, you have three options:
- Desk risers: Add 2–4 inch risers under the desk legs to extend the maximum height. These cost $15–30 and are stable when properly sized.
- Thinner walking pad: Some walking pads have lower platforms (3.5–4 inches vs 5–6). A thinner pad reduces the total height increase.
- Keyboard tray below desk surface: A clamp-on tray drops the keyboard 1–3 inches below the desk surface, effectively lowering the required desk height by the same amount.
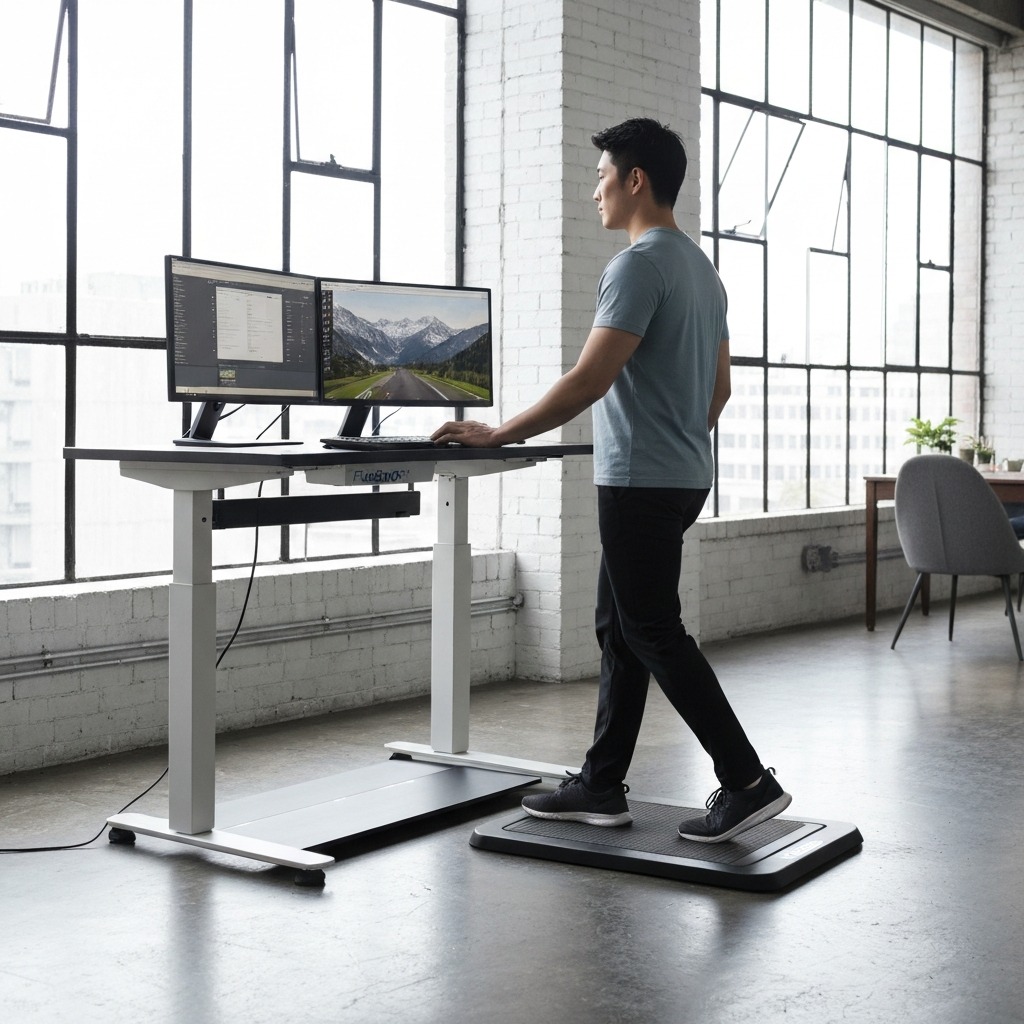
Step 2: Monitor Height and Position
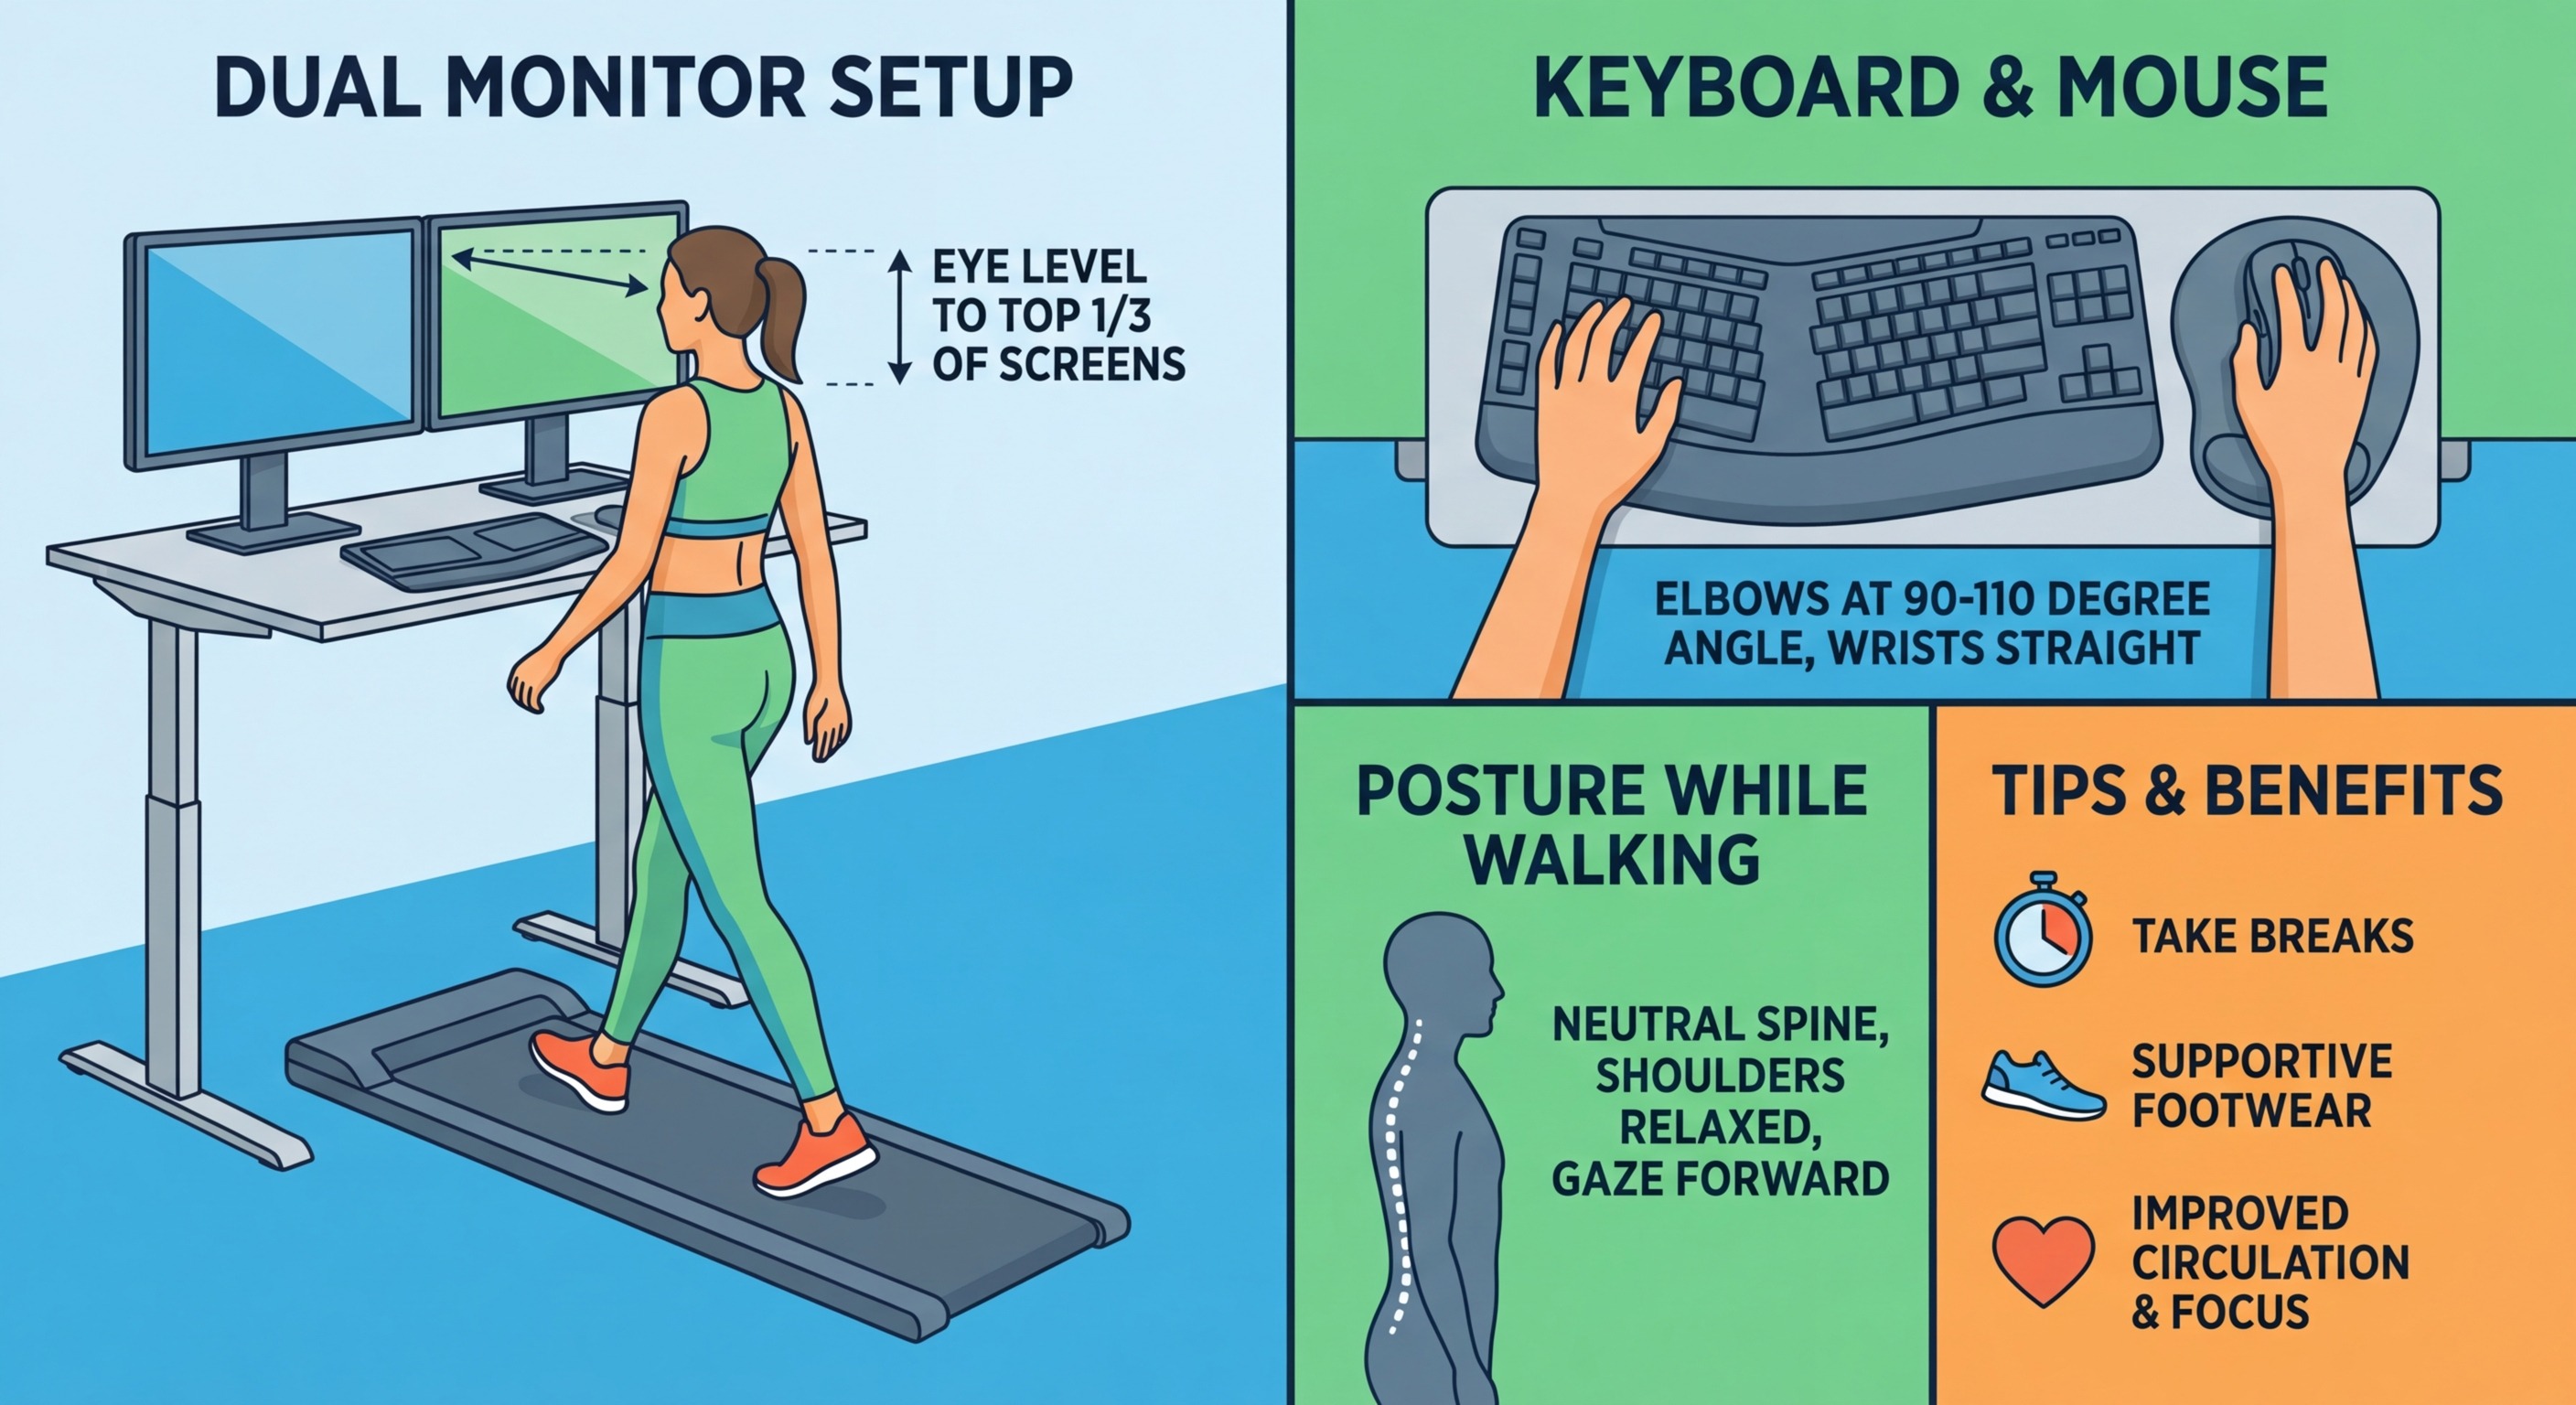
The Rule: Top of Screen at Eye Level
While walking on the pad at your normal speed (1.5–2.0 mph), the top edge of your monitor should be at or slightly below your eye level. The center of the screen should be approximately 15–20 degrees below your horizontal gaze.
Why Walking Changes Monitor Position
Walking introduces two factors that static standing does not:
Height change: You are 4–6 inches taller on the pad. Your old standing monitor height is now at chest level.
Vertical bounce: Each step moves your head up and down 0.5–1.5 inches. This makes a stationary screen appear to bounce slightly. Positioning the monitor at the correct height and distance minimizes this effect.
Monitor Positioning Checklist
| Factor | Recommendation | Why |
|---|---|---|
| Height | Top of screen at eye level while walking | Prevents neck flexion |
| Distance | 24–30 inches from your eyes | Reduces perceived bounce; comfortable viewing |
| Tilt | Slight upward tilt (5–10°) | Perpendicular to your gaze angle |
| Mounting | Monitor arm (strongly recommended) | Height adjustment + vibration absorption |
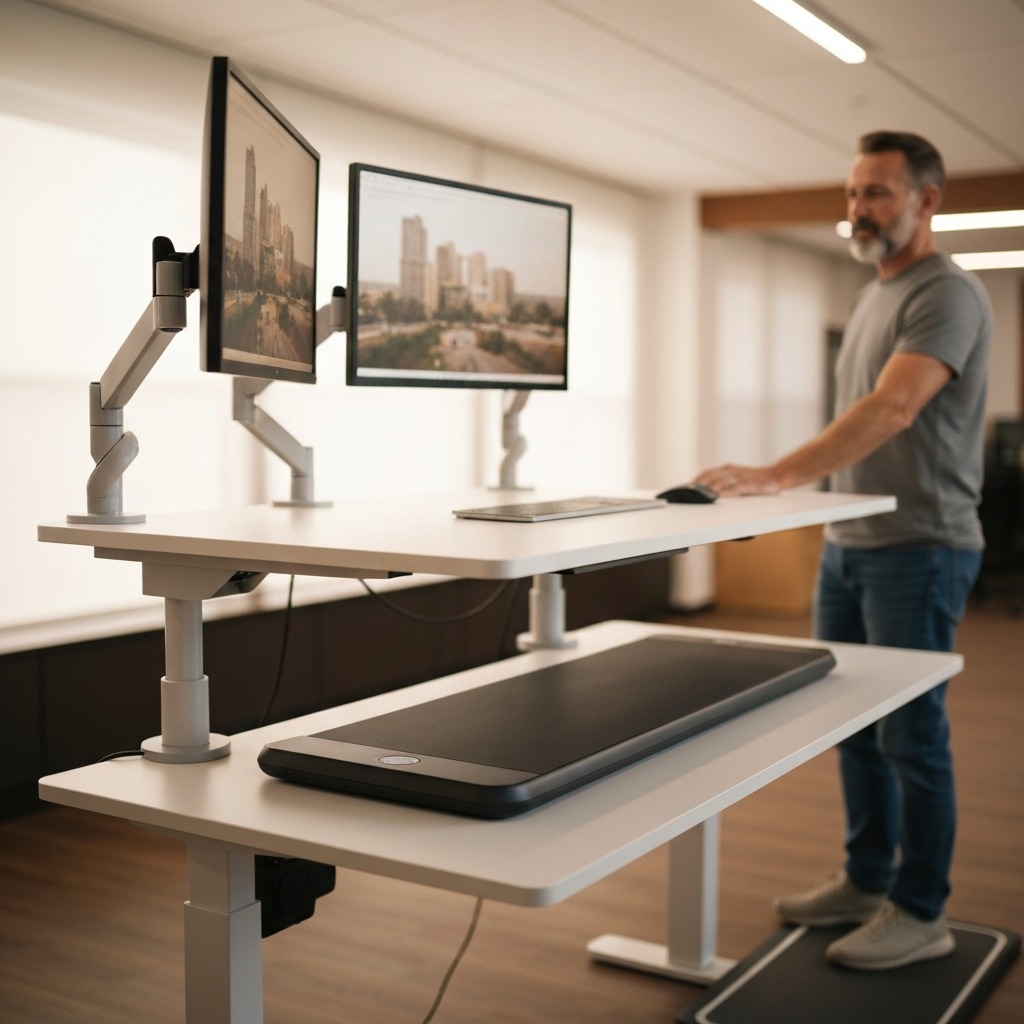
Why a Monitor Arm Matters
A monitor arm ($30–80) solves three problems simultaneously:
- Precise height adjustment — raise or lower to the exact eye level for your walking pad height, which is different from your sitting or standing height
- Vibration isolation — the arm's spring mechanism absorbs micro-vibration from the walking pad's motor, which a rigid stand transmits to the screen
- Depth flexibility — push the screen back to 28–30 inches during walking (reduces bounce perception) and pull it forward to 22–24 inches for detailed sitting work
If you already own a standing desk but not a monitor arm, the arm is the single most impactful accessory for your walking pad setup.
Step 3: Keyboard and Mouse Placement
Height: At Desk Surface (If Desk Height Is Correct)
If you set your desk to elbow height per Step 1, your keyboard can sit directly on the desk surface. Your forearms will be parallel to the floor, elbows at 90 degrees — the ergonomically correct position.
Position: Centered, Close, Flat
| Factor | Guideline | Why |
|---|---|---|
| Distance from desk edge | 4–6 inches | Room for wrist rest; prevents reaching |
| Keyboard tilt | Flat or slight negative tilt | Reduces wrist extension |
| Mouse placement | Immediately beside keyboard, same height | Minimizes reach, reduces shoulder strain |
| Wrist rest | Recommended | Stabilizes wrists against walking bounce |
The Walking Bounce Issue
Walking creates a rhythmic vertical bounce in your arms — 0.5–1 inch per step. This means your fingers rise and fall slightly relative to the keys with each step. At 1.5 mph, the bounce is barely perceptible. At 2.5 mph, you will notice occasional mistypes from the movement.
Solutions:
- A wrist rest at keyboard height provides a stabilizing contact point that dampens the bounce
- Lighter touch typing — let your fingers float above the keys rather than resting on them heavily
- Slower walking speed during intensive typing sessions
- A split keyboard can allow each hand to find its natural resting position independently
Walking Speed by Task Type
This is the practical heart of walking pad desk use. Match your speed to your task:
Speed Reference Table
| Speed | Best Tasks | Typing Impact | Calorie Burn (155 lb) |
|---|---|---|---|
| 1.0 mph | Video calls, precision design, detailed spreadsheets | None | ~150 cal/hr |
| 1.5 mph | Deep writing, coding, focused typing | Minimal (2–5% slower) | ~185 cal/hr |
| 2.0 mph | Email, messaging, general desk work | Mild (5–10% slower) | ~210 cal/hr |
| 2.5 mph | Light typing, browsing, reviewing documents | Moderate (10–15% slower) | ~225 cal/hr |
| 3.0 mph | Reading, phone calls, podcast listening | Typing impractical | ~260 cal/hr |
| 3.5+ mph | Exercise only — no desk work | Not viable | ~315+ cal/hr |
Dynamic Speed Adjustment
The best walking pad users change speed throughout the day based on what they are doing:
Writing an important report? Drop to 1.5 mph for maximum typing accuracy.
Clearing email inbox? Walk at 2.0–2.5 mph — the reduced typing precision does not matter for short replies.
On a phone call? Crank to 3.0 mph — your hands are free, maximize the movement.
Detailed spreadsheet work? Drop to 1.0 mph or stop entirely — precise mouse work benefits from a stable body.
Most walking pads have a remote control (handheld or clip-on) that makes speed changes effortless. Some have app control for speed adjustment without reaching for the pad controls. For calorie burn comparisons, see our walking pad vs exercise bike guide.
The Keyboard Tray Question
When You Need One
A keyboard tray is useful in three scenarios:
1. Desk is too high. If your desk surface is 2–3 inches above elbow height and cannot be lowered further, a clamp-on keyboard tray drops the keyboard to the correct height.
2. You share the desk. If multiple people use the same desk (partners, roommates) at different heights, a tray lets each person adjust keyboard height without moving the entire desk.
3. You want to push the keyboard away. When standing still or using the desk for non-typing tasks, sliding the tray under the desk creates a clean surface.
When You Do Not Need One
If your desk adjusts to your exact elbow height while on the walking pad, the keyboard sits at the correct height on the desk surface. A tray adds complexity and cost without benefit.
Keyboard Tray Options
| Type | Price | Pros | Cons |
|---|---|---|---|
| Clamp-on sliding tray | $25–60 | Easy install, adjustable, slides under desk | Adds weight, may wobble on thin desks |
| Under-desk mount tray | $40–100 | Most stable, full-width support | Requires drilling, permanent installation |
| Desk shelf/riser | $20–40 | Raises keyboard above desk; lifts monitor too | Only raises — cannot lower below desk surface |
For most walking pad users with an adjustable desk, skip the tray and invest in a monitor arm instead.
Video Calls While Walking
Walking during video calls is entirely doable — with the right speed and setup.
Speed and Visibility
| Speed | Camera Bounce | Audio Impact | Recommended? |
|---|---|---|---|
| 1.0 mph | Barely visible | Silent with good pad | ✅ Ideal |
| 1.5 mph | Slightly visible if watching closely | Faint footsteps on open mic | ✅ Good — mute when not speaking |
| 2.0 mph | Noticeable head movement | Audible footsteps on open mic | ⚠️ Only with mute discipline |
| 2.5+ mph | Obviously walking | Breathing and footsteps audible | ❌ Not recommended for calls |
Video Call Setup Tips
- Camera at eye level while walking — not sitting eye level (too low) or standing eye level (may be too low)
- Mute by default. Unmute only when speaking. Even quiet walking pads produce ambient sound that an open microphone picks up.
- Slightly wider frame. Zoom out your camera slightly so walking bounce is less noticeable. Chest-up framing hides the walking.
- Stable background. A virtual background eliminates any environmental motion cues that reveal you are walking.
- Walk at 1.0–1.5 mph during calls. Save the faster walking for email time.
The Laptop Setup (and Why It Needs Fixing)
If you work from a laptop on a walking pad desk, you have an immediate ergonomic problem.
The Problem
A laptop screen on the desk surface is 10–15 inches below eye level when you are standing on a walking pad. To see the screen, you tilt your head forward 25–40 degrees. This forward head posture increases the load on your neck from ~12 lbs to ~40 lbs at 30 degrees. Add walking bounce and you have a recipe for neck pain within an hour.
The Fix (Three Tiers)
Budget ($40–60): Laptop stand ($15–25) to raise screen to eye level + basic external keyboard ($15–20) + basic external mouse ($10–15). The minimum viable setup.
Better ($100–150): Monitor arm with laptop tray ($40–60) + quality keyboard ($40–60) + ergonomic mouse ($25–40). More adjustable, better typing feel.
Best ($250–400): External monitor on monitor arm ($150–300) + quality keyboard + ergonomic mouse. The external monitor is larger, more adjustable, and ergonomically independent of your input devices. The laptop sits closed or to the side as a secondary screen.
The upgrade from a laptop-on-desk to any of these three tiers is the single biggest ergonomic improvement you can make for a walking pad desk.
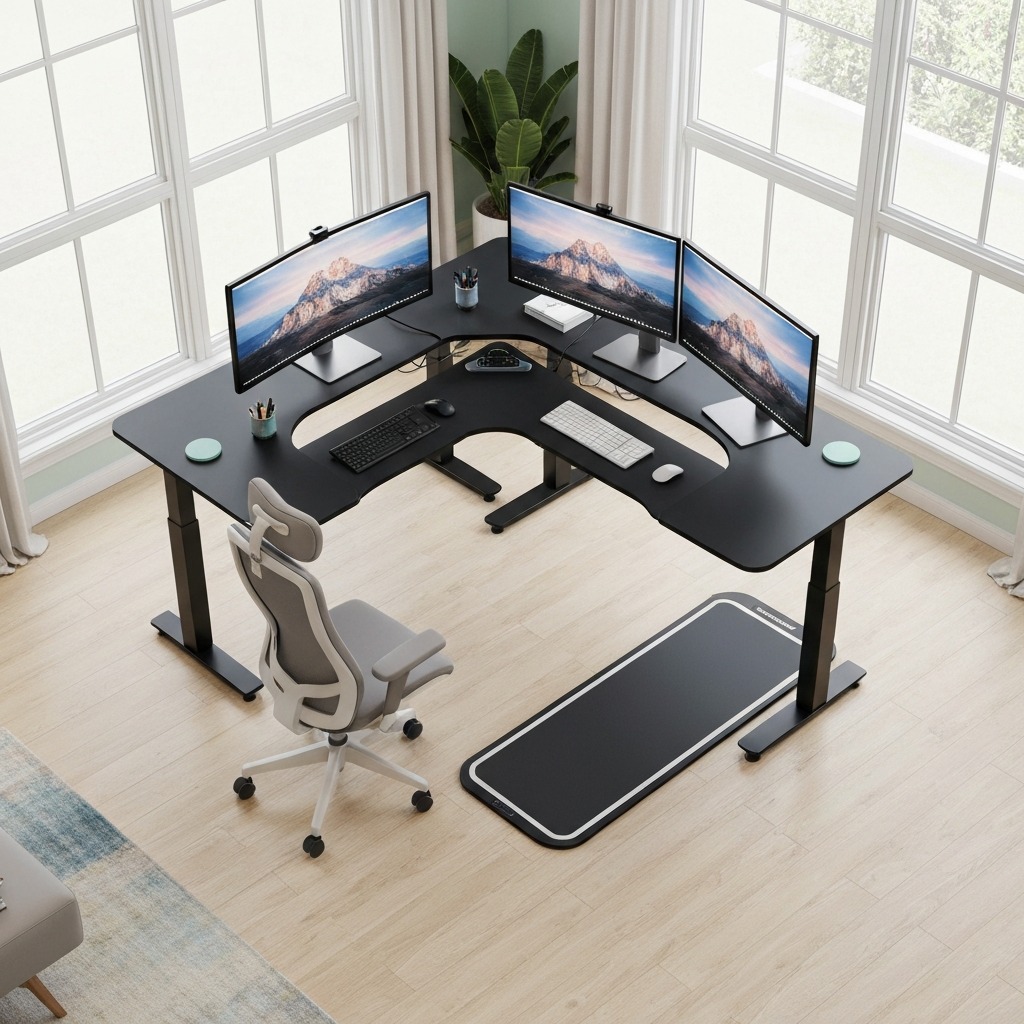
Equipment Checklist
Essential (Must Have)
| Item | Purpose | Price Range |
|---|---|---|
| Adjustable-height desk | Accommodate the 4–6" height change from pad + shoes | $200–600 |
| Walking pad | The movement device | $200–600 |
| Anti-vibration mat | Floor protection, noise reduction, anti-slip | $20–40 |
| Supportive walking shoes | Foot support during multi-hour walking sessions | $20–80 |
Strongly Recommended
| Item | Purpose | Price Range |
|---|---|---|
| Monitor arm | Precise screen height, vibration isolation | $30–80 |
| External keyboard (if using laptop) | Separate screen height from typing height | $15–60 |
| External mouse (if using laptop) | Same — separate input from display | $10–40 |
| Wrist rest | Stabilizes wrists against walking bounce | $10–25 |
Nice to Have
| Item | Purpose | Price Range |
|---|---|---|
| Wireless keyboard and mouse | No cable drag or tangle near the pad belt | $30–80 |
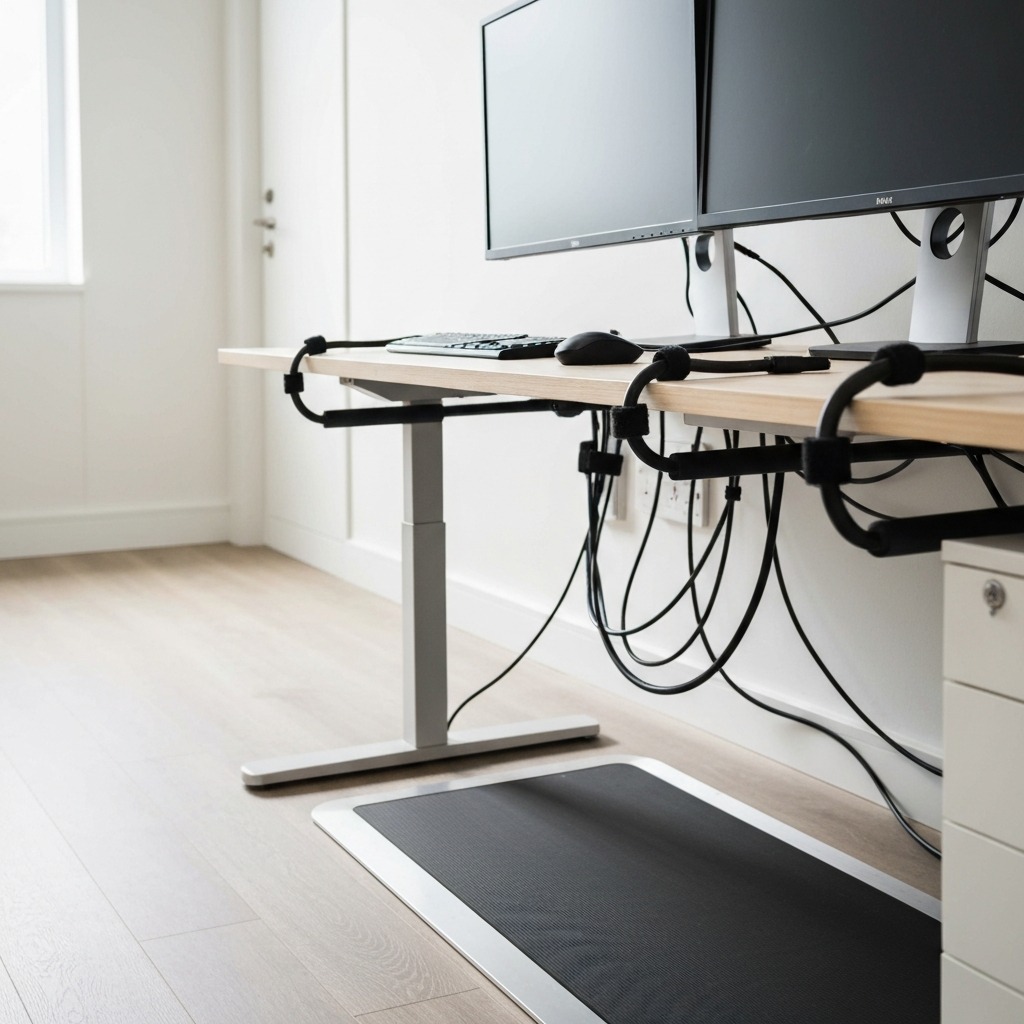
| Cable management tray | Routes cords safely away from the pad | $15–30 |
| Small desk fan | Walking generates body heat | $15–30 |
| Keyboard tray (if desk is too high) | Lowers keyboard 1–3" below desk surface | $25–60 |
For floor protection details, see our best walking pad mat guide. For pad sizing and weight considerations, see our best walking pad for small apartments guide.
First-Week Adjustment Schedule
Do not walk 6 hours on day one. Build gradually:
| Day | Walking Time | Speed | Focus |
|---|---|---|---|
| Day 1 | 45–60 min | 1.0 mph | Get comfortable walking. Email and browsing only. |
| Day 2 | 1–1.5 hrs | 1.0–1.5 mph | Try light typing. Notice desk height — adjust if needed. |
| Day 3 | 1.5–2 hrs | 1.5 mph | Normal desk work at slow speed. Verify monitor height. |
| Day 4 | 2–2.5 hrs | 1.5 mph | Extended session. Note fatigue — feet, back, focus. |
| Day 5 | 2.5–3 hrs | 1.5–2.0 mph | Increase speed. Typing should feel manageable. |
| Week 2 | 3–4 hrs | 2.0 mph | Full work sessions with sitting breaks every 90 min. |
| Week 3 | 4–5 hrs | 2.0–2.5 mph | Dynamic speed adjustment by task type. |
| Week 4+ | 4–6 hrs | Your optimal range | Established routine with sit/stand/walk rotation. |
The Sit/Stand/Walk Rotation
The goal is not to walk all day. It is to rotate positions:
- Walk: 60–90 minutes (active work, email, calls)
- Stand: 10–15 minutes (stretch, rest feet)
- Sit: 20–30 minutes (detailed work, lunch, focused reading)
- Repeat
This rotation prevents the fatigue that comes from any single position held too long. For the full daily schedule, see our walking pad desk ergonomics guide.
Frequently Asked Questions
How high should my desk be for a walking pad?
Elbow height while standing on the pad in walking shoes — typically 38–46 inches for most adults. The pad adds 4–6 inches above floor standing height. An electric adjustable desk (28–48" range) is the best solution.
Where should my monitor be?
Top of screen at eye level while walking. Use a monitor arm for precise adjustment and vibration isolation. Measure while walking, not standing still — your walking eye height includes gait bounce.
What speed should I walk while typing?
1.5–2.0 mph for full productivity. Start at 1.0 mph your first week. At 2.0 mph, expect 5–10% typing slowdown that resolves within 1–2 weeks. Above 3.0 mph, typing is impractical.
Do I need a keyboard tray?
Only if your desk cannot lower to elbow height. If desk height is correct, the keyboard sits on the surface at the right height. A tray is useful for shared desks or desks that are 2–3 inches too high.
Can I take video calls while walking?
Yes, at 1.0–1.5 mph. Mute when not speaking. Camera at eye level, slightly wider frame. Above 2.0 mph, head movement becomes visible on camera.
What is the best desk for a walking pad?
An electric adjustable desk with 28–48 inch range and memory presets. FlexiSpot, Uplift, and IKEA BEKANT are popular options. Must be stable — a wobbling desk amplifies walking pad vibration.
Should I use a laptop or external monitor?
External monitor on a monitor arm is best. A laptop screen on the desk surface forces severe neck flexion. If using a laptop, raise it to eye level with a stand and add an external keyboard and mouse.
How do I stop the walking pad from sliding?
Place a rubber or PVC equipment mat underneath. The mat's grippy surface prevents forward creep on smooth floors. A 4–6 mm mat also protects floors and reduces noise.
Sources and Methodology
This guide provides walking pad desk setup instructions based on occupational ergonomic standards and workstation design principles.
Ergonomic Standards:
- OSHA: Computer Workstation eTool — desk height, monitor position, and input device placement — osha.gov
- NIOSH: Elements of Ergonomics Programs — workstation design for musculoskeletal disorder prevention — cdc.gov/niosh
- ANSI/HFES 100-2007: Human Factors Engineering of Computer Workstations — desk height and monitor angle standards
Biomechanical References:
- Cervical spine load during forward head tilt: ~12 lbs at neutral, ~40 lbs at 30° flexion — from published cervical biomechanics research
- Treadmill walking vertical oscillation: 0.5–1.5 inches per step at walking speeds — gait biomechanics literature
Treadmill Desk Research:
- Typing performance during treadmill walking: maintained or minimally reduced at speeds under 2.0 mph — consistent across published treadmill desk studies
- CDC: Physical Activity Guidelines — reducing sedentary behavior through movement during work
Methodology notes:
- Desk height ranges calculated from average adult heights with typical walking pad platform and shoe heights
- Walking speed typing impact based on aggregated treadmill desk research and user experience
- Calorie estimates from the Compendium of Physical Activities MET values
- Equipment pricing reflects typical US retail at publication
- This guide provides ergonomic information, not medical advice. Consult a physician for musculoskeletal concerns
- We may earn a commission on purchases at no additional cost to you; affiliate relationships do not influence recommendations
Internal links referenced:
- Walking Pad vs Exercise Bike
- Best Walking Pad Mat
- Best Walking Pad for Small Apartments
- Walking Pad Desk Ergonomics
Visual Guide Gallery